Today we'll learn the easy steps to find MAC address on Windows 11. Being a learner, I understand the importance of knowing your device's MAC address for various network-related tasks. Whether you're troubleshooting network issues or setting up a new device, locating the MAC address is a important step.
In this article, I'll guide you with clear instructions and steps in simplified way on how to easily find the MAC address on your Windows 11 PC or Laptop. Let's dive in and get started!
In today's digital age, knowing how to find the MAC address on your Windows 11 device is a valuable skill. As an experienced tech enthusiast, I've encountered numerous instances where having this information proved essential. Whether you're configuring network settings, securing your network, or troubleshooting connectivity problems, the MAC address plays a vital role. In this article, I'll share my knowledge and expertise to help you quickly locate your MAC address on Windows 11. Let's get started on this empowering journey!
What is a MAC address?
A Media Access Control (MAC) address is a unique identifier assigned to a network interface controller (NIC) of a device. It is a string of alphanumeric characters, typically represented in six pairs separated by colons or hyphens. MAC addresses are assigned by the manufacturer at the hardware level and are used to uniquely identify devices on a network.
Why Do You Need to Find MAC Address on Windows 11?
As a Windows 11 user, you might wonder why you would need to find the MAC address of your network interface controller (NIC). Well, there are several reasons why knowing your MAC address can be beneficial. Let's explore two main scenarios where finding the MAC address on Windows 11 becomes essential:
Setting up a Network Connection
When setting up a network connection, whether it's at home, in the office, or at a public hotspot, knowing your MAC address can be crucial. Here's why:
- Authentication: Some networks, especially Wi-Fi networks in public places, require MAC address filtering for security purposes. By providing your MAC address to the network administrator, you can ensure that your device is permitted to connect to the network.
- Device Identification: In networks where multiple devices are connected, such as in an office or school setting, administrators may use MAC addresses to identify and differentiate devices. It helps them manage network resources effectively and troubleshoot any potential connectivity issues.
- Network Troubleshooting: In case you encounter connection issues, knowing your MAC address allows network administrators to troubleshoot the problem more efficiently. They can check if the MAC address is banned or experiencing any conflicts that might be causing the connectivity problem.
Now that we understand the importance of finding the MAC address when setting up a network connection, let's move on to the next scenario.
Troubleshooting Network Issues
Network connectivity problems can be frustrating, but finding your MAC address can help diagnose and resolve these issues more effectively. Here's how:
- MAC Address Filtering: Some routers or firewalls may have MAC address filtering enabled, which allows or blocks specific MAC addresses from accessing the network. By knowing your MAC address, you can check if it's blocked or add it to the allowed list.
- Network Configuration: When troubleshooting network issues, administrators may ask for your MAC address to verify the configuration settings on their end. By providing this information, they can ensure that the correct settings are in place and make any necessary adjustments.
- Connection Conflicts: If multiple devices share the same MAC address, connection conflicts can occur, leading to network disruptions. By identifying the unique MAC address of your device, you can help resolve these conflicts and maintain a stable network connection.
Finding the MAC address on Windows 11 is essential for various network-related tasks. Whether you're setting up a network connection or troubleshooting network issues, having your MAC address at hand can save you time and streamline the process of getting connected or resolving connectivity problems. So, next time you find yourself in need of your MAC address, remember that Windows 11 provides two methods to find it: using the Command Prompt or accessing the Control Panel.
Easy Methods to Find MAC Address
If you're using Windows 11 and need to find the MAC address of your network interface controller (NIC), there are two straightforward methods you can follow. Whether you prefer using the Command Prompt or the Control Panel, I've got you covered. Let's dive into these easy methods to find your MAC address.
Method 1: Using Network Settings
To find the Mac address on Windows 11, you can follow these simple steps in the Network Settings:
Step 1: Open the Settings App
First, open the Settings app by clicking on the “Start” button in the taskbar and then selecting the gear-shaped icon. Alternatively, you can press the Windows key + I on your keyboard as a shortcut.
Step 2: Go to Network & Internet
Once the Settings app is open, scroll down and click on “Network & Internet” from the list of available options. This will take you to the Network & Internet settings page.
Step 3: Select Advanced Network Settings
On the Network & Internet settings page, locate and click on “Advanced network settings” near the bottom of the page. This will open a new window with additional network settings.
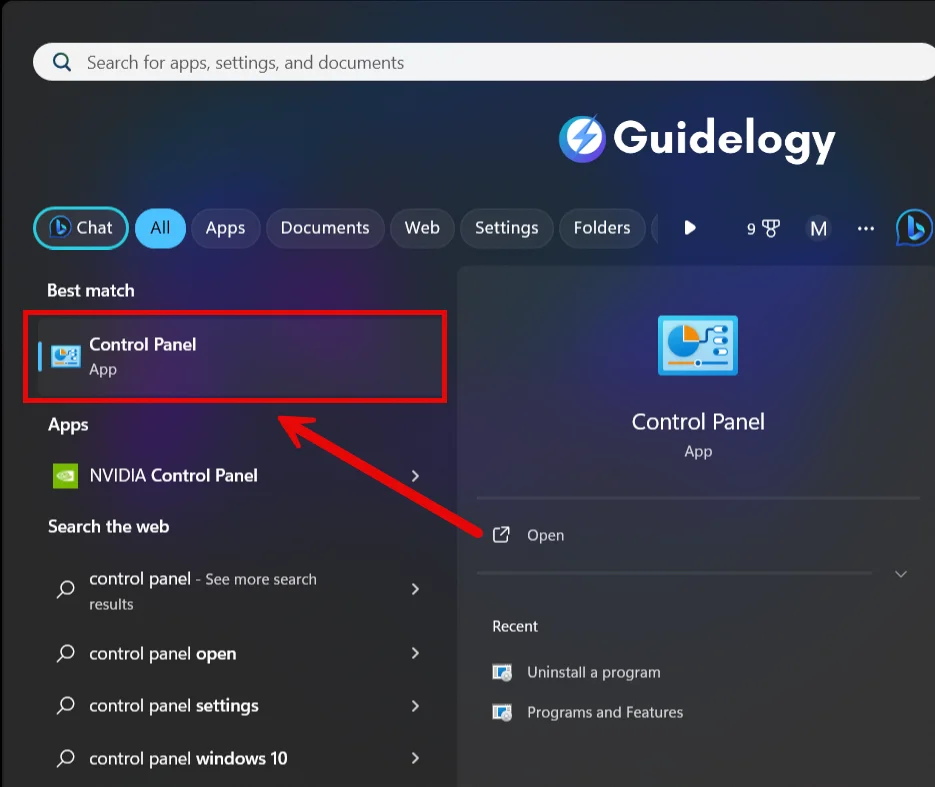
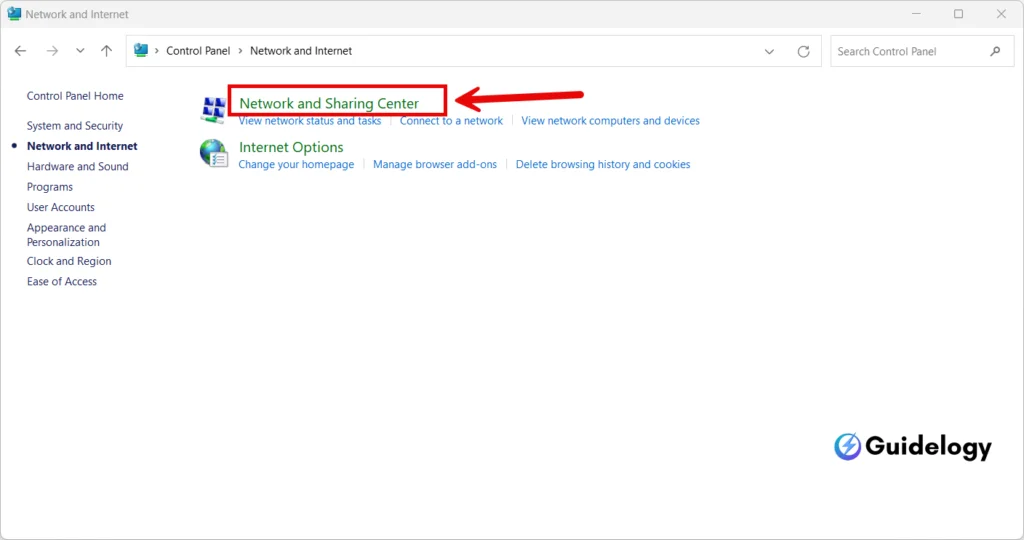
Step 4: Choose Network & Sharing Center
In the new window, you will see a section labeled “Advanced network settings.” Under this section, click on “Network and Sharing Center” to access the main Network and Sharing Center window.
Step 5: Click on Change Adapter Settings
Once you are in the Network and Sharing Center window, look for the “Change adapter settings” option on the left-hand side of the window and click on it. This will open a window that displays all the network adapters on your computer.
Step 6: View MAC Address of the Network Adapter
In the “Change adapter settings” window, you will see a list of network adapters available on your computer. Right-click on the adapter for which you want to find the Mac address and select “Status” from the context menu.
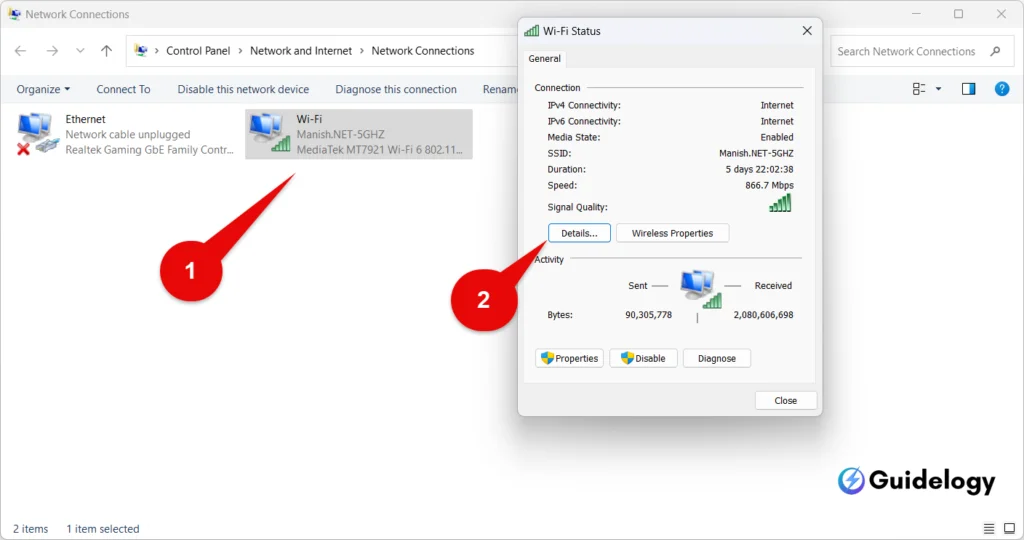
A new window will open, showing information about the network adapter. Click on the “Details” button.
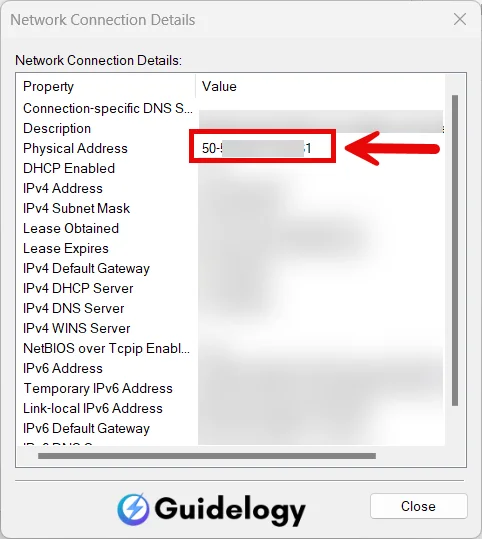
In the “Network Connection Details” window, you will find various pieces of information about the network adapter, including the Mac address. Locate the “Physical Address” field, and next to it, you will see the Mac address of the selected network adapter.
That's it! You have successfully found the Mac address of a network adapter using the Network Settings in Windows 11.
Remember, the Mac address is a unique identifier assigned to each network adapter. It is essential for network configuration, troubleshooting connectivity issues, and securing networks. Knowing the Mac address can help with device identification, authentication, network troubleshooting, MAC address filtering, resolving connection conflicts, and more.
In addition to the Network Settings method, you can also find the Mac address using the Command Prompt or accessing the Control Panel. These alternative methods provide flexibility for users who prefer different approaches or have specific requirements.
By following the steps outlined above, you can easily find the Mac address of a network adapter on a Windows 11 computer. Remember to bookmark this guide for future reference and feel free to explore the other methods mentioned in this article to find the Mac address in a way that suits your needs.
Method 2: Using Command Prompt
Step 1: Open the Command Prompt
To find the MAC address on your Windows 11 computer using the Command Prompt, follow these steps:
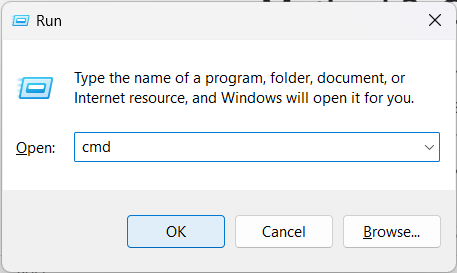
- Press the Windows key + R to open the Run dialog box.
- Type cmd and press Enter to open the Command Prompt.
Step 2: Type “ipconfig /all” and press Enter
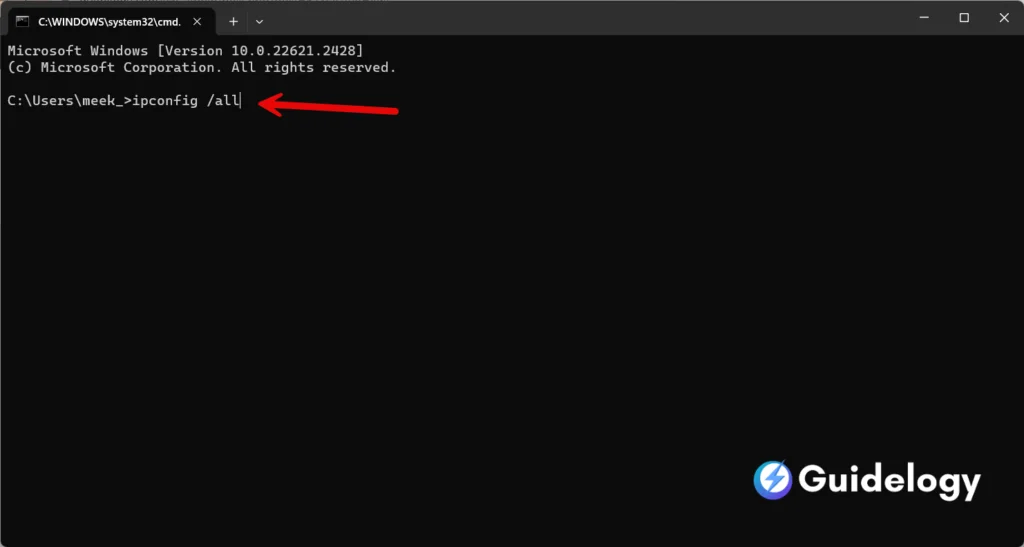
Once the Command Prompt window opens, type ipconfig /all and press Enter. This command will display detailed information about your network configuration, including the MAC address.
Step 3: Find the Physical Address
Scroll through the information displayed in the Command Prompt window until you find the Physical Address. The Physical Address is another term for the MAC address on Windows operating systems.
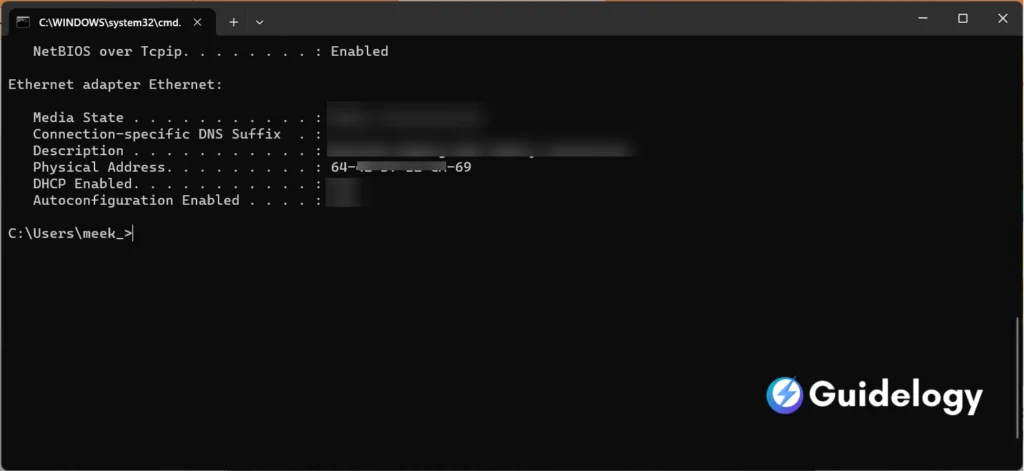
The MAC address is usually listed under the name “Ethernet adapter” or “Wireless LAN adapter,” depending on your network connection type. Look for the line that says “Physical Address” followed by a series of alphanumeric characters separated by hyphens or colons. This is the MAC address of your network adapter.
It's important to note that if your computer has multiple network adapters (such as an Ethernet adapter and a Wi-Fi adapter), you may see multiple MAC addresses listed. Make sure to identify the MAC address associated with the network adapter you are interested in.
Once you have found the MAC address, you can use it for various purposes, such as troubleshooting network connectivity issues, securing your network by implementing MAC address filtering, or registering your device on a network that requires MAC address authentication.
By using any of these methods, you can easily find the MAC address on your Windows 11 computer. Whether you prefer the Command Prompt, the Network Settings method, or the Control Panel, you now have multiple options at your disposal. This flexibility ensures that you can always access your MAC address quickly and efficiently.
Method 3: Using PowerShell
If you prefer using PowerShell to find the MAC address on your Windows 11 computer, you're in luck! PowerShell is a powerful command-line shell and scripting language that can provide you with detailed information about your network adapters.
Step 1: Open PowerShell
To begin, open PowerShell on your Windows 11. You can do this by following the steps below:
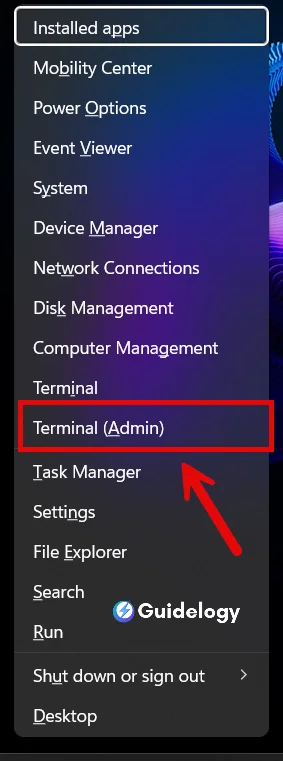
- Press the Windows key + X on your keyboard to open the Power User menu.
- From the menu, select Windows PowerShell (Admin) / Terminal (Admin) . If you don't see this option, you can select Windows PowerShell / Terminal instead.
Step 2: Type “Get-NetAdapter | select Name, MacAddress” and press Enter
Once you have PowerShell open, you can proceed with the next step. In the PowerShell window, type the following command:
Get-NetAdapter | select Name, MacAddress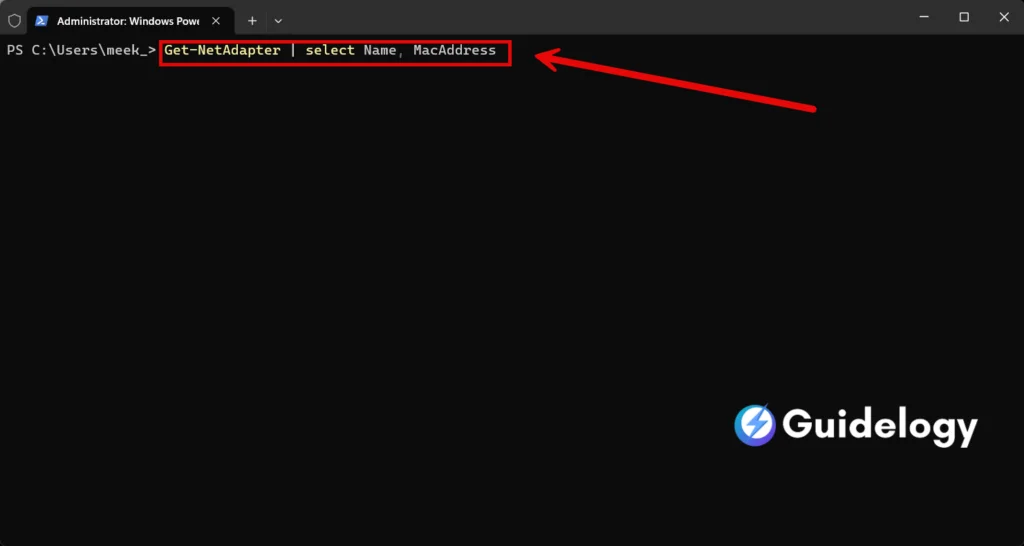
After typing the command, press Enter on your keyboard. PowerShell will execute the command and provide you with a list of network adapters along with their corresponding MAC addresses.
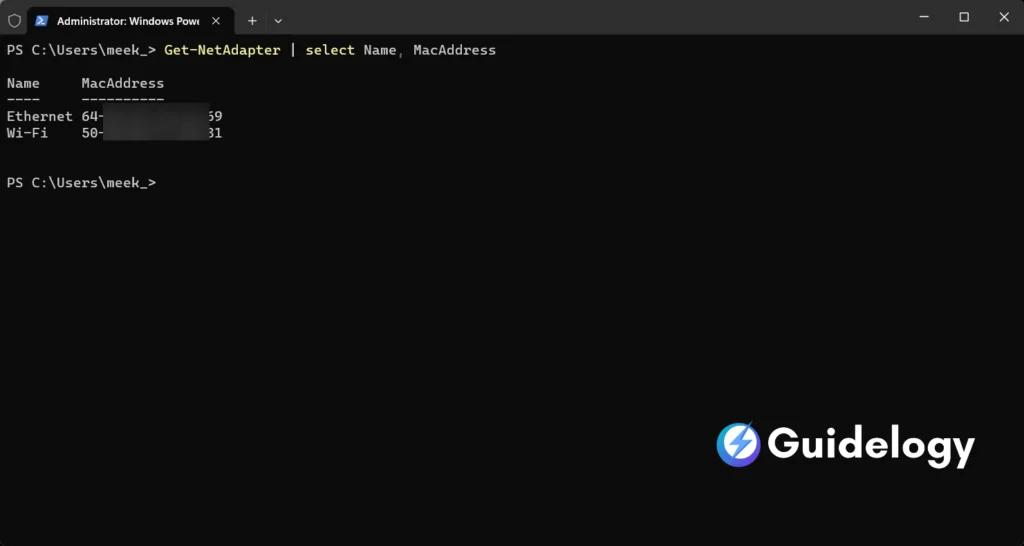
Step 3: Find MAC Address in the output
In the output generated by PowerShell, you'll see the names of the network adapters as well as their MAC addresses. Look for the MAC address associated with the network adapter you're interested in.
The MAC address is a unique identifier consisting of six pairs of hexadecimal digits. It is usually displayed in the format “XX-XX-XX-XX-XX-XX” or “XX:XX:XX:XX:XX:XX”, where “XX” represents a hexadecimal digit.
By following these three simple steps, you can easily find the MAC address of your network adapters using PowerShell on your Windows 11 computer.
Now you have multiple methods at your disposal to find the MAC address based on your preference and familiarity with different tools.
Remember, knowing your MAC address can be helpful for network configuration, diagnosing connectivity problems, and enhancing the security of your network. So, whether you prefer using the Network Settings method, the Command Prompt, the Control Panel, or PowerShell, you can always rely on these methods to retrieve the MAC address on your Windows 11 computer.
As a final tip, don't forget to bookmark this guide for future reference.
It's important to note that the MAC address is a unique identifier assigned to network interfaces. It is used for various network-related tasks, such as identifying devices on a local network, filtering network traffic, and troubleshooting connectivity issues. Knowing how to find the MAC address can be particularly useful in scenarios where you need to configure or secure your network.
Now that you have learned about various methods to find the MAC address on Windows 11, including the Network Settings method, Command Prompt and Control Panel, you can easily retrieve this information whenever needed.
Remember to always keep your MAC address private and secure, as it can potentially be used for unauthorized network access. If you need to share your MAC address for legitimate purposes, make sure you only do so with trusted individuals or organizations.
I hope this guide has been helpful in assisting you with finding the MAC address on your Windows 11 computer. Bookmark this article for future reference and feel free to explore our other articles for more tips and tricks related to Windows 11.
Conclusion
Finding the MAC address on a Windows 11 computer is a simple process that can be done using various methods, such as the Network Settings, Command Prompt, Control Panel and PowerShell. By following the step-by-step instructions provided in this article, you can easily locate your MAC address and use it for network configuration, troubleshooting connectivity issues, and enhancing network security.
The MAC address is a unique identifier that plays a crucial role in network communication. It allows devices to communicate with each other on a local network and helps prevent unauthorized access. Knowing how to find your MAC address is essential for managing your network effectively and ensuring a smooth and secure connection.
I hope this guide has been helpful in assisting you in finding the MAC address on your Windows 11 computer. Remember to bookmark this article for future reference, as it provides a comprehensive overview of the different methods available to locate your MAC address. With this knowledge, you can confidently navigate your network settings and resolve any connectivity issues that may arise. Keep following Guidelogy for more such tutorials.
A comprehensive guide on finding the MAC address on Windows 11. It’s well-explained, and simple to follow. Great for troubleshooting network issues or setting up a new device. The information about why we need MAC addresses is especially beneficial.